Updated October 18, 2023.
How do I use pump?
 G7's multi-gas pump cartridge uses configuration modes to enable and disable the pump. Configuration modes allow G7 to temporarily change its behavior, such as enabling pump or muting gas alarms. Modes can be entered/exited from the main menu under Modes or from G7's secondary menu, accessible by pressing the up or down arrows from G7's main gas screen.
G7 has three pumped modes: pre-entry, leak check, and pump run.
Enter and exit these modes to turn pump on and off. Pre-entry and leak check modes have a configured timeout period, where after the configured timeout has elapsed, you can extend or leave the mode. If you don't make a choice within 30 seconds, G7 will automatically return to normal mode and pump will turn off.
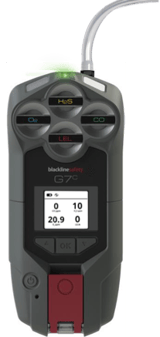
To use pump, attach a multi-gas pump cartridge to your G7 device, insert your quick connect and attached tubing, and enter a pumped mode. Pump will turn on automatically. When pump is on, the pump icon will be visible on G7’s main screen.
Bump tests and calibrations
How do I bump test and calibrate G7 with a pump cartridge?
The pump cartridge is bump tested and calibrated in the same way all other G7 gas cartridges are. 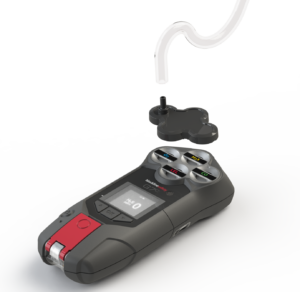 To manually calibrate or bump test:
- Attach calibration cap to one end of the tubing.
- Attach the other end of the tubing to a fixed flow regulator on your calibration gas cylinder.
- Attach the calibration cap to the cartridge
- Press OK to access the Main menu.
- Using the up and down arrows, navigate to Gas options and press OK.
- Use the OK button to select Bump test or Calibration.
- Follow the instructions on G7’s screen to complete the calibration or bump test.
Bump testing and calibrating using G7 Dock 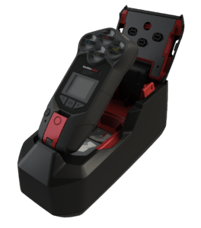
If your G7 Dock is model DOCK-P, you can bump test and calibrate in G7 Dock.
NOTE: G7 cannot be bump tested or calibrated through the pump. It must be done over the sensors with a calibration cap or G7 Dock.
Block tests
How do I perform a block test?
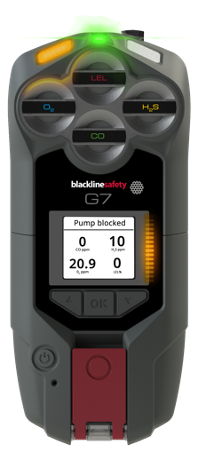
You will be asked to perform a block test upon entering any pumped mode. Follow the steps on G7’s screen to complete the block test. If G7 does not pass the block test, you will not be able to enter the mode.
IMPORTANT: Residual gas in the tubing may cause G7 to go into alarm during an automatic block test. Ensure your tubing is clear when entering a pumped mode test to avoid false alerts.
When you are in a pumped mode, you can perform a manual block test at any time by plugging G7’s inlet. This will cause G7 to go into yellow warning alarm, and your screen will let you know that your pump is blocked. Unplug your inlet, and if the warning alarm silences, you know that your equipment is safe to use.
Pump details
Where do I see my pump details?
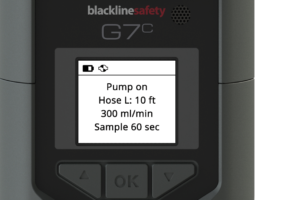 When a pump cartridge is attached to G7, you can see the pump status screen by pressing the up or down arrow from G7’s main status screen. Here you can see if pump is on or off, your hose length, flow rate and sample time (if enabled).
What is flow rate?
Flow rate is the speed at which air is passing over your device’s sensors. To provide accurate gas readings, the flow rate needs to be above 150 ml/min. A flow rate less than 150 ml/min will result in a pump block yellow warning alarm. By default, Blackline’s pump aims to maintain a flow rate of 300 ml/min and G7 will automatically adjust its pump speed to maintain this rate.
Sample timer
What is the sample timer?
The sample timer is the amount of time it takes for one air sample to be pumped to your sensors. This calculation is based partly on your hose length. If the sample timer is enabled, the pump status screen will show a countdown and beep once when a sample cycle has completed. The sample cycle will repeat continuously until you turn pump off. If disabled, the sample timer will not show and the device will not beep, but pump will continue to function normally. Blackline recommends a 120 second sample time for 10 feet of tubing, with an additional second per additional foot of tubing.
How do I enable the sample timer?
- Press OK to enter G7’s Main menu.
- Use the up and down arrows to navigate to Settings and press OK.
- Use the up and down arrows to navigate to Pump options and press OK.
- Select Sample timer off.
- Select Yes to confirm that you would like to enable the sample timer.
How do I disable the sample timer?
- Press the OK button to enter G7’s main menu
- Use the up and down arrows to navigate to Settings and press OK.
- Use the up and down arrows to navigate to Pump options and press OK.
- Select Sample timer on.
- Select Yes to confirm that you would like to disable the sample timer.
Hose length
What is hose length?
Hose length is an estimate of how long the hose attached to pump is. This value is customizable from the Pump options menu, and factors into sample time. G7's multi-gas pump cartridge supports the following hose lengths, based on hose diameter:
- Up to 50 feet of 0.125 in. (1/8 in.) diameter hose
- Up to 100 feet of 0.188 in. diameter hose
How do I change hose length?
- Press OK to enter G7’s Main menu.
- Use the up and down arrows to navigate to Settings and press OK.
- Use the up and down arrows to navigate to Pump options and press OK.
- Select Hose length.
- Use the up and down arrow to enter the first digit of your length and press OK.
- Use the up and down arrow to enter the second digit of your length and press OK.
- Use the up and down arrows to choose your units, meters or feet, and press OK.
- Select Yes to confirm your length or select Edit to make changes.
For questions on pump cartridges, G7, or other support inquiries, our Customer Care team is here to help.


