The following questions related to Blackline Safety products and services have been frequently asked by customers:
- What do I do if I've missed a check-in? - G7c/G7x/G7 Bridge
- How can I assign a device to a team member? - Blackline Live
- My device is not connecting and/or my device is blinking. What does this mean? - G7c/G7x/G7 Bridge
- Can I calibrate my device with anything other than methane? - Cartridges/MPS sensor/IR sensor
- My bump test or calibration failed in G7 Dock. What do I do? - G7 Dock
- How do I calibrate my five-gas cartridge? - Cartridges
- How long does it take to download firmware? - Firmware
- Why does my device have different options than my co-worker's device? - G7c/G7x
- My device has been misplaced or lost. Can you help me track it down? - G7c/G7x/Blackline Live
What do I do if I've missed a check-in?
Missed check-ins may occur due to:
- Powering off your G7c or G7x while it’s not connected to the network: When your device isn't connected to the network/server, the power off sequence data isn’t captured. This causes Blackline Live to recognize your device as powered on and operational which causes your check-in to register as missed.
- Turning off bridge before turning off G7x: If you turn off bridge before turning off G7x, the connection between G7x and the network/server is interrupted. If there is an interruption or no connection to the network/server when a check-in is due, this leads to a missed check-in.
- Leaving G7c or G7x unattended when the check-in is due.
WHAT TO DO IF YOU MISSED A CHECK-IN DUE TO SHUTTING DOWN WHEN NOT CONNECTED OR IMPROPER SHUTDOWN:
- Power down your device if it is not already fully powered down. If your device is G7x, also power down G7 Bridge.
- If your device is G7x, power up G7 Bridge.
- Power up your device.
- When the device light is solid green, proceed with the steps below.
WHAT TO DO IF YOU’VE MISSED A CHECK-IN DUE TO LEAVING YOUR DEVICE UNATTENDED OR LOST CONNECTIVITY:
- For missed check-ins: Check in early if you know you will be entering an area where there is no connectivity.
- For lost connectivity: If your device is connected to the network/server (indicated by a solid green light at the top of your device), you can message "False Alert" or "Issue Resolved" from your device to notify that there is no issue.
NOTE: A blinking green light indicates your device is not connected to the network/server. You will not be able to send a message if it is not connected.
Ensure your device is in an open environment without any obstructions that may impede the signal, such as concrete walls. Move your device outdoors in an open area. For G7x, ensure G7 Bridge is online and that you have not moved too far from Bridge.
How Can I assign a device to a team member?
WHAT YOU’LL NEED BEFORE YOU ASSIGN A DEVICE:
To create and edit team members, you need access to the All Devices group.
When creating a team member profile in the Blackline Live portal, determine if the team member will be a "Contact" or an "Account User". "Contacts" do not have access to Blackline Live, while "Account Users" do.
HOW TO CREATE A TEAM MEMBER PROFILE:
- In Blackline Live, select Menu > Team members.
NOTE: Team members is under the Features column. - Select ADD TEAM MEMBER, located on the right side of the screen.
- Select one of the following:
- Contact if the team member will not require access to the Blackline Live portal
- Account User if the team member requires Blackline Live portal access
- Select NEXT.
- Enter the team member’s information in the appropriate fields
- If you selected Account User in step 3, also select the groups you want them to have access to and set the levels of access you want them to have within these groups. For example, if you want a team member to have View only access to a specific group, select the group, then select View only from the group’s drop down.
- Scroll down to the bottom of the page and select ADD TEAM MEMBER.
MY DEVICE IS NOT CONNECTING AND/OR MY DEVICE IS BLINKING. WHAT DOES THIS MEAN?
UNDERSTANDING G7C CONNECTIVITY:
A blinking green light at the top of G7c indicates that your device is not connected to the network. A yellow warning alarm on G7c notifies you when the network connection has been interrupted. To acknowledge the connection loss and silence the alarm, press and hold the up and down arrows.
G7c will automatically reconnect to the network as soon as it is able to do so.
TROUBLESHOOTING:
To troubleshoot connectivity, try the following:
- Move to an area with better connectivity
- Power cycle the device
UNDERSTANDING G7X CONNECTIVITY:
A blinking green light at the top of G7x indicates that your device is not connected to G7 Bridge, or G7 Bridge is not connected to the network. A yellow warning alarm on G7x notifies you when your device connection has been interrupted. To acknowledge the connection loss and silence the alarm, press and hold the up and down arrows.
G7’x connection to G7 Bridge may have been interrupted due to the following:
- The distance between your G7x and G7 Bridge is greater than 2 km.
- There may be obstacles or walls between your G7x and G7 Bridge.
- G7 Bridge may have lost connection to the network/server.
TROUBLESHOOTING:
To troubleshoot connectivity, try powering off G7x then G7 Bridge, and then power on G7 Bridge then G7x.
My gas detection (or reading) is showing a negative value and/or displaying an alert, but I am in fresh air. What do I do?
If you zero G7c or G7x in an environment where gas is present then move to an area with fresh air, your device may display a negative reading. To correct this, zero your device again when you are in an area with fresh air.
Can I calibrate my device with anything other than methane?
CALIBRATING YOUR MPS SENSOR
The MPS sensor can detect and classify a wide variety of combustible gases, but it must be calibrated with methane.
CALIBRATING YOUR IR SENSOR
Blackline recommends using methane when calibrating the IR sensor to ensure accuracy and flexibility, but the IR sensor can be calibrated with other hydrocarbons.
WARNING: You must fully understand the limitations and technology when calibrating with other hydrocarbons.
My bump test or calibration failed in G7 Dock. What do I do?
TO TROUBLESHOOT A FAILED BUMP TEST OR CALIBRATION:
If you are using G7 Dock to bump test or calibrate your device and the bump test or calibration fails, check G7 Dock’s setup and connection to ensure it is properly set up. Leave the device in G7 Dock after the failed bump test until G7 Dock’s menu opens, then select Calibration.
If the bump test or calibration still fails, perform the following steps:
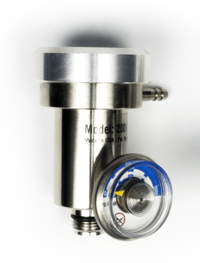
- Confirm that your gas cylinder has pressure in the bottle. If the psi is low, that may be the cause of the failed bump test or calibration. You may need to swap out your cylinder.
- Check the regulator to see if you have a demand-flow regulator. If the regulator has an open/close valve, it is a fixed-flow regulator instead of a demand-flow regulator. G7 Dock requires a demand-flow regulator for bump tests and calibrations.
- Check the concentration values on the cylinder to ensure they match G7 Dock’s settings.
- Check that the gas cylinder is connected to the correct inlet on G7 Dock.
- Check the integrity of the tubing and that the tubing is securely connected to G7 Dock and the cylinder.
- Once you have verified your setup is correct, perform a calibration.
How do I calibrate my five-gas cartridge?
On a five-gas cartridge, the H2S and CO are combined. If you are performing calibration in G7 Dock, you will need a demand-flow regulator. If you are performing calibration manually, you will need a fixed-flow regulator.
 |
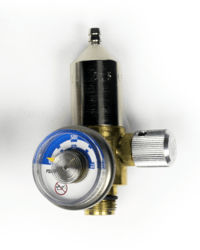 |
| Demand-flow Regulator for Calibration in G7 Dock | Fixed-flow Regulator for Manual Calibration |
HOW TO CALIBRATE YOUR FIVE-GAS CARTRIDGE IN G7 DOCK:
When calibrating a five-gas sensor, check if your calibration gas cylinder can calibrate all five gases. If it can, perform a regular calibration. If it cannot, you will need a separate cylinder to calibrate the additional gas sensor(s). This additional cylinder needs to be connected to a separate inlet on G7 Dock to calibrate the fifth gas.
Use a demand-flow regulator, which calibrates the quad gas first, then calibrates the fifth sensor.
- Power on G7.
- Place G7 into G7 Dock.
- Close the lid until it clicks in place.
- On G7, press the OK button to open the Main menu.
- Press G7’s up and down arrow buttons to navigate to and select Calibration. G7 Dock will perform the calibration. G7’s screen will indicate if the calibration has passed or failed and when G7 is ready to be removed from G7 Dock.
TROUBLESHOOTING FIVE-GAS CARTRIDGE CALIBRATION IN G7 DOCK
Verify that your setup is correct by performing the following steps:
- Check the concentration on your cylinders and make sure they match the values in G7 Dock’s configuration.
- Verify that you are using a demand flow regulator.
- Check that your cylinders are connected to the correct inlets.
- Check your tubing for damage or kinks.
- Verify that you have a secure connection.
HOW TO CALIBRATE YOUR FIVE-GAS CARTRIDGE MANUALLY
Use only a fixed-flow regulator. Ensure you have a cylinder or cylinders for each of your device’s gas sensors.
- Remove the calibration cap.
- On G7c/G7x, press OK.
- Select Gas Options > Calibration and place the detector in clean air.
- Confirm the span values displayed.
- Confirm that all sensors are to be zeroed.
- When doing the span portion, clear the checkbox for the additional sensor.
- Apply the quad gas mix first (CO/H2S/LEL/O2).
- When the quad gas calibration is complete, change the regulator to your second cylinder.
- Apply gas when prompted. G7’s screen will indicate whether the calibration passed or failed.
How long does it take to download firmware?
Downloading firmware can take up to 72 hours depending on your device connection. The better the connection, the faster the download.
Why does my device have different options than my co-worker's device?
Reasons your device may be different from a co-worker’s include:
- You have a different configuration
- You have different sensors
- Your devices may be running different firmware versions
My device has been misplaced or lost. Can you help me track it down?
If you have misplaced your device, you can locate the last recorded location on the Blackline Live portal.
NOTE: Only people configured as Account Users can perform the following steps in the Blackline Live Portal. If you are configured as a Contact and do not have access to the Blackline Live portal, ask an Account User to help you.
HOW TO LOCATE YOUR DEVICE USING THE BLACKLINE LIVE PORTAL:
- In the Blackline Live portal, select Maps, located at the top left of the main page.
- Enter your device number in the Search field, then select Search. The last logged location of your device will display on the map. If your device is connected to the network, the device icon on the map will be blue. If your device isn't connected to the network, the device icon will be grey and show the last pinged location of your device.
NOTE: Your device location can also be viewed in the Blackline Live portal by searching for your device, then selecting Locate once or Continuous locate.
I CONNECTED MY DEVICE TO THE CHARGER AND PLUGGED IT IN, BUT NOTHING IS SHOWING ON THE DISPLAY SCREEN AND THE RED CHARGING LIGHT IS NOT ON. WHAT DOES THIS MEAN?
If your device battery was fully drained before you connected the charger and plugged it in, it may take up to 15 minutes for the battery to charge enough to power the display screen.
If the red light doesn’t turn on when the device is connected to the charger and plugged in, the charger hasn’t been properly secured to the device. You may need to check the connection and try connecting it again. When the device and charger are secured, the red charging light will turn on.


