Updated: February 8, 2024
This article describes how to calibrate a G7 device equipped with an ozone (O3) sensor.
Before you begin:
The calibration of ozone (O3) sensors requires the use of a gas generator, connected to a gas bottle containing 20% oxygen balanced with nitrogen to supply calibration gas. Always refer to the user manual provided with your gas generator for detailed instructions on setting up and operating the unit.
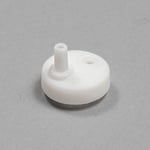
A single-gas calibration cap must be used to calibrate O3 sensors. The cap directs the flow of generated ozone directly to the sensor through the cartridge face opening.
Use the Blackline Safety single-gas calibration cap (ACC-S-CAL-E) to calibrate O3 sensors. This cap ensures that sufficient gas is supplied to the sensor during calibration. For more information on the cap, contact the Blackline Safety Technical Support team.
IMPORTANT: The calibration cap is rated for use in temperatures between 5°C and 40°C (41°F and 104°F). When not in use, the calibration cap should be stored away from direct sunlight.
CAUTION: Never use a multi-gas calibration cap to calibrate O3 sensors. Never use G7 Dock to calibrate O3 sensors.
To calibrate a G7 O3 sensor:
- Ensure that the O3 generator you are using has been warmed up and stabilized before using it as a calibration source. Refer to the operating manual for the generator you are using for detailed instructions.
- Attach tubing to the calibration cap and to the outlet of the gas generator.
- Set the flow rate for the gas generator according to the generator manual.
NOTE: The appropriate flow rate depends on the gas generator you are using. Always follow the instructions provided with your generator when setting the flow rate of the oxygen source for O3. - Open the main menu on G7 by pressing OK.
- Navigate to Gas options using the up and down arrow buttons and press OK.
- Navigate to Calibration using the up and down arrow buttons and press OK.
- When prompted, select Yes to start the calibration.
G7 performs a hardware self test of its lights, sound, and vibration. - On the G7 display screen select the O3 sensor, ensuring that any other sensors are not selected.
- Use the up and down arrow buttons to select Start span and press the OK to start the calibration.
- G7 will begin to count down from 60. Attach the calibration cap to your device and apply the gas within this time window.
G7 automatically detects the gas and starts the calibration. - Turn off the gas when prompted by G7 and press OK to complete calibration.
G7 will let you know if the calibration has passed or failed, and when your next calibration is due. - Allow the residual gas to clear, then disconnect the calibration cap, and let your G7 sit in clean air until the readings stabilize.


